Are you looking to enhance the visuals of your Minecraft world? Well, you need to install Shaders in Minecraft because it is a great gaming experience! Shaders are sophisticated visual effects that give Minecraft an improved graphic look. It will make your Minecraft world come alive with vibrant colors and shading. This article will provide a step-by-step guide to help you install shaders on your Minecraft game. With our instructions, you’ll be able to modify the graphics and take your gaming experience to the next level in no time!


Minecraft is one of the most popular video games in the world and has been around for over a decade. It allows players to explore and create their own world with the use of blocks, tools, and other items. To improve your Minecraft experience, you can install Shaders on it.
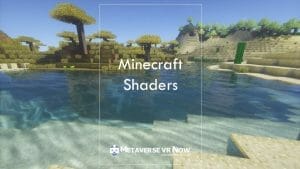
Install Shaders on Minecraft
Minecraft is a beloved game that has been around for a decade. It is full of exploration, creativity, and adventure. One of the more recent additions to the world of Minecraft has been shaders, which can be used to make your Minecraft experience even more immersive. Installing shaders on your Minecraft can give you access to beautiful visuals and an improved gameplay experience.
Installing shaders on Minecraft may initially seem confusing, but it doesn’t have to be! With just a few simple steps, you can get started with adding this amazing feature to your game. This guide will walk through every step so that you can get your shader up and running as quickly as possible without any difficulty. So if you’re looking for an easy way to install shaders on Minecraft, this is the guide!
Prerequisites: What You Need
Installing Shader on your Minecraft game can be a challenging task, but it’s one worth taking on if you want to upgrade the way your game looks. Before you get started, however, there are some prerequisites that you need to check off your list in order to ensure successful installation.
The first prerequisite for installing a shader on your Minecraft game is an updated version of the game itself. While shader mods may work with older versions, they offer better performance and aesthetics on newer versions. Make sure that you have the most up-to-date version of Minecraft before beginning installation.
In addition to having an updated version of the Minecraft software, you also need a good graphics card to run shaders properly.
Step 1: Downloading Shader Pack
To install shaders on Minecraft, the first step is to download a shader pack. A shader pack contains all the files you need to run shaders on Minecraft. It usually includes one or more .zip files, which contain multiple .fsh and .vsh files used by the game to create dynamic lighting and other effects. You can search for “Minecraft shader packs” online to find a suitable shader pack. Once you download your shader pack, save it somewhere safe, as you will be using it later in this process.
After downloading the shader pack, unzip its contents into a folder so they can be accessed easily when needed.
Step 2: Installing Optifine
Once the necessary hardware requirements have been met, the next step in installing shaders on Minecraft is to install Optifine. This mod allows users to modify their graphics settings and optimize the gameplay experience. It also offers additional features that help with performance optimization, such as improved framerates, dynamic lighting, and more realistic textures. Installing Optifine is easy – all you need to do is download the correct version from its official website, open it up with a Java application like WinRAR or 7-zip and extract it into your Minecraft directory. Once extracted, you can launch the game with Optifine enabled and began tinkering with the various graphical options available for further customization of your gaming experience. With Optifine installed, you’ll enjoy even better visuals than what vanilla Minecraft can offer– giving you an immersive gaming experience unlike any other!
Step 3: Applying Shaders
Installing shaders on Minecraft is a great way to add a new layer of realism and beauty to the game. Step 3 of the process involves actually applying the shader packs you’ve downloaded. Before doing this, it’s important to ensure that your computer meets all of the requirements needed for running shaders, such as having an updated version of Java or at least 1 GB RAM. Once your system is ready, follow these steps to get started:
Firstly, launch Minecraft and choose the “Options” button within the main menu. Then select “Video Settings” followed by “Shaders” in order to open up a list of available options. From there, click on one of your downloaded shader packs and hit “Done”; this will automatically apply the shader pack to your game session. To check if the shader has been successfully implemented, press F3 or select Options -> Shaders -> Open Shaders Folder to view the new shaders folder. You can now confirm that the shader pack has been applied by looking at the contents of this folder.
Troubleshooting: Common Issues
Troubleshooting is an essential part of any successful Minecraft installation. If you’re having trouble getting Shader to work properly, don’t worry – there are a few common issues that can be easily resolved with troubleshooting. Knowing the most common problems and how to fix them can save you time and effort to optimize your game.
The first step in troubleshooting any issue is to ensure you use the correct version of Shader for your game. Older versions may not be compatible with certain versions of Minecraft, so checking this before proceeding is important. Secondly, if you have multiple versions installed on your computer, ensure only one version is active at any time. This is also a good way to ensure that you use the correct version of Shader.
If you are installing Shader, remember that it s important to install the newest version of Java on your computer.
Customization: Making it Your Own
Customization has always been an important part of the Minecraft experience, and now players can take it to the next level by installing Shader. Not only does Shader allow players to customize the look and feel of their game world, but it also enhances their gaming experience overall. Installing Shader is not difficult as long as you follow some easy steps. Players can choose from various visual styles, including realistic water, dynamic lighting, and other effects that help bring Minecraft worlds to life. By following this guide, you can install Shader on your own computer or console in no time! With just a few clicks of your mouse or controller buttons, you can be ready to explore all the customizations available for your game – making it truly yours!
What is Minecraft Shader?
Minecraft Shader is a type of graphical overhaul for the popular sandbox game Minecraft. It provides enhanced graphical features such as dynamic lighting, shadows, and reflections, as well as improved textures and effects. With the help of shaders, players can drastically enhance the visual experience of their Minecraft world.
Shader packs are collections of resources that allow players to customize their graphic settings with various tweaks, including improved light effects and water animations. These packs offer an abundance of options for further graphic enhancement, allowing users to make their gaming environments look realistically beautiful. Installing shaders is a relatively easy process that requires very little technical knowledge – all you need is a compatible version of Minecraft and the shader pack itself!
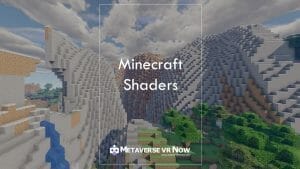
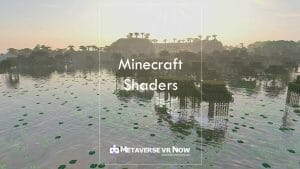
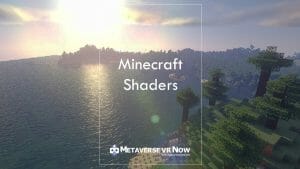
Benefits: Visual Improvements of Shaders in Minecraft
If you’re looking to take your Minecraft experience to the next level, installing a shader is a great way to do it. The shader has the ability to dramatically improve the visual quality of your Minecraft world, giving it an entirely new look and feel. With shaders, players can enjoy lighting, shadows, and more improvements, which can make their game come alive.
Shader adds new special effects, such as dynamic shadows and reflections, that give the environment a more realistic appearance. Additionally, other visual improvements like improved water animations and higher resolution textures create a much richer gaming experience than before. With a shader installed on Minecraft, players can see detailed sunlight patterns and improved lighting effects, which help bring out colors and ambiance for a more immersive gaming experience.
Installing: Requirements to Install Shaders in Minecraft
If you’re a fan of Minecraft, you’ve likely heard of Shader – the popular software mod that brings a level of realism to the game. With Shader, your Minecraft world will be enhanced with amazing lighting and shadow effects, giving it a look and feel many players desire. Installing Shader is easy and requires only basic computer knowledge. Here are some requirements to consider before installing Shader on your Minecraft game:
First and foremost, you must have Java installed on your device to install Shader properly on your Minecraft game. This is an essential component for running any mods or plugins in the game. Additionally, make sure you’re using the latest version of Java – this ensures compatibility with all other software requirements. Second, you must have an Android or iOS device in order to download and install Shader. While it is possible to use a PC to install the mod on Minecraft, it is not recommended because you cannot access all of the features that come with this mod.
Popular Types: Install Shaders in Minecraft with SEUS, KUDA, BSL
Shaders are popular mods in the world of Minecraft. They allow players to customize their gaming experience by adding more textures, shadows, and lighting effects. Two of the most popular types of shaders used by gamers are SEUS (Sonic Ether’s Unbelievable Shaders) and KUDA Shaders. Both provide realistic lighting effects for an immersive gaming experience.
Another popular shader is BSL (BSL Shader). This shader mod is geared toward those who want to take their gameplay to the next level with rich visuals and detailed graphics. It adds realistic reflections, improved water waves, and texture, making your world look more lifelike than ever! With these shaders installed on your system, you will be able to create truly unique environments while enjoying some stunningly beautiful visuals in your Minecraft world. If you are a fan of the realistic graphics in realistic games like GTA, then BSL Shader should be your go-to choice. This shader is definitely one of the best shaders for Minecraft Xbox One Edition, but it does come with a bit of a learning curve.
Compatibility: Platforms & Versions in Installing Shaders in Minecraft
Installing a shader can give your game an impressive upgrade with realistic lighting effects and improved textures. But before you start downloading these upgrades, you must first understand the compatibility parameters between platforms and versions that involve installing shaders on Minecraft.
The first thing to consider is what version of Minecraft do you currently have. This matters since some shaders are only compatible with certain versions of the game. Additionally, if you’re running a previous version, then there may be other considerations, such as having an appropriate graphics card or enough RAM available for installation. For example, Doom Shaders are available for versions 1.8 and up, but you must have a graphics card that supports OpenGL 2.1 or higher, and it may also require a lot of RAM to run the shader. Likewise, CEMU shaders are compatible with Minecraft 1.9

Summary: How to Install Shaders in Minecraft
In conclusion, installing shaders on Minecraft is a great way to improve your game’s overall appearance and atmosphere. While installing shaders can be intimidating, you can have a much more immersive experience with a few easy steps. First, you need to determine what type of shader is best for you and your device. Then, download the files from the official website. Finally, install the shader pack in your resource packs folder.
When gamers install shaders on Minecraft, the game is more visually appealing and immersive. With just a few simple steps, you can easily customize the look of your game world. Remember, if you encounter any problems along the way, plenty of helpful tutorials and community forums can provide assistance and advice. Finally, don’t forget to have fun as you explore all the new possibilities that shaders bring to your Minecraft experience!